 The power of the night’s sky is truly something to behold. For centuries, stars have been looked at as Gods, points of light to navigate by, and even shimmering lights to simply enjoy. If you’re like many of us, you don’t live hundreds of miles away from unnatural light sources where long exposure night photography is more attainable. If you have an opportunity to take a grand star trail image but long exposures are gathering too much light from nearby cities, this technique may be a good trick for you.
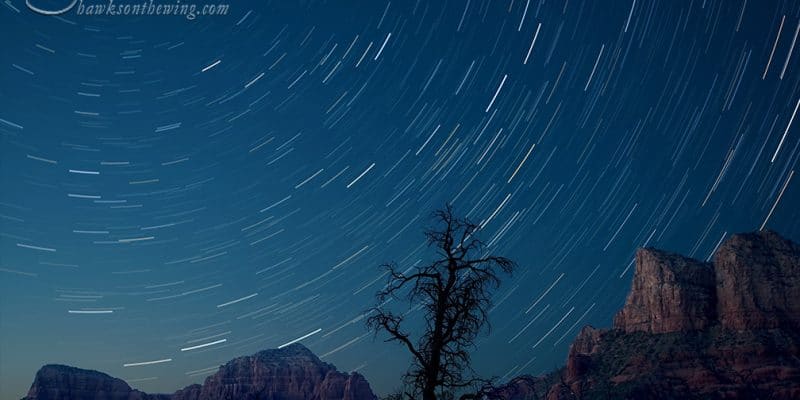
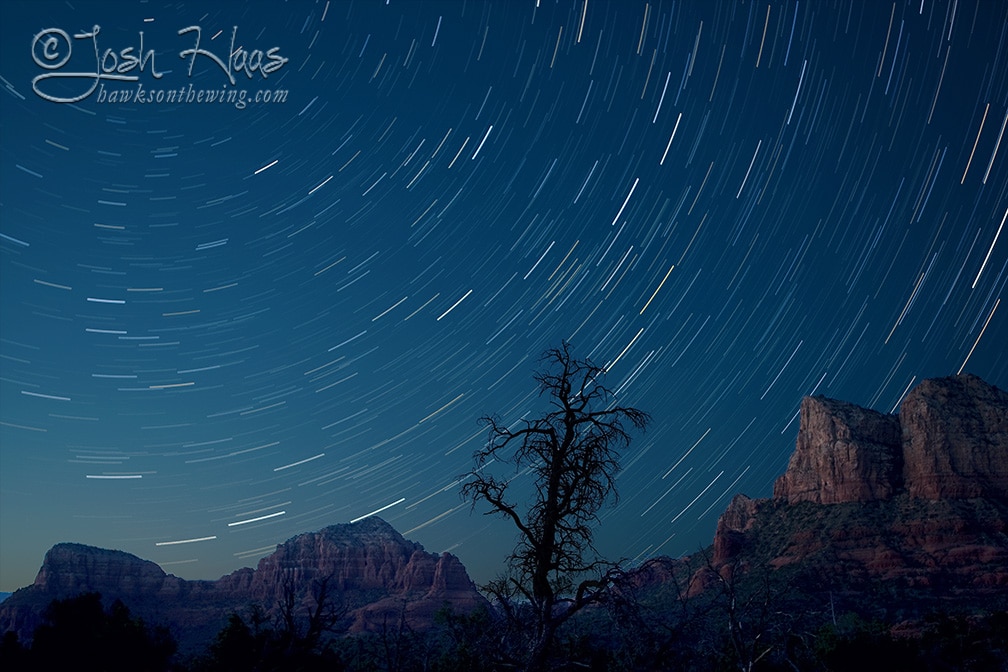
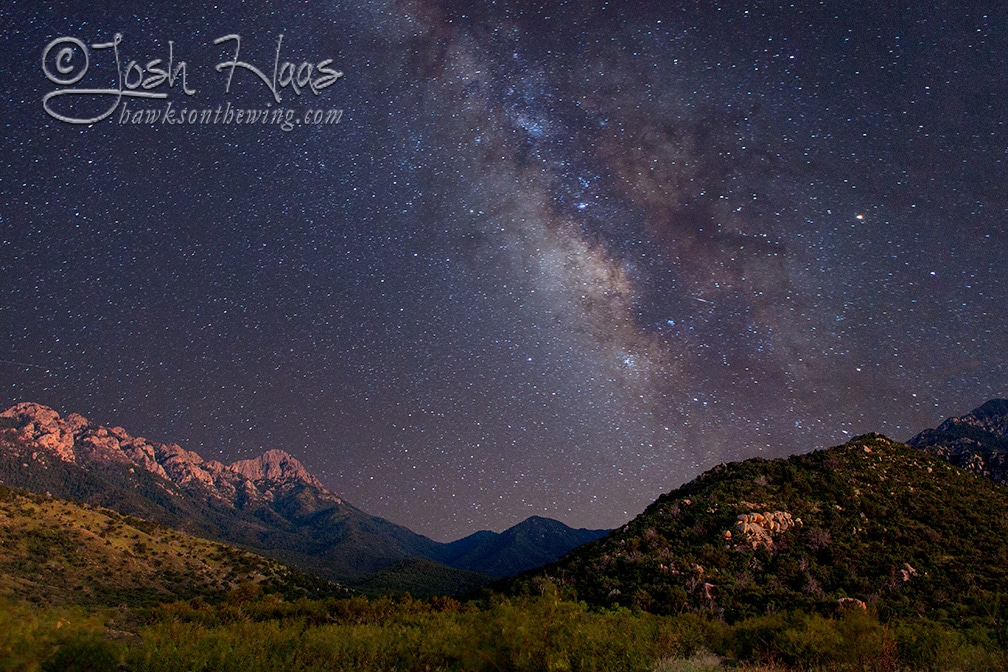
On a landscape trip to Arizona a few years ago, my goals was to come back with a great nightscape image. What I envisioned was something with great foreground elements, star trails and enough lighting to make the entire scene incredibly dynamic. Once in Arizona, we did the obvious shooting early in the mornings and late in the evenings. The remainder of the time during the days was spent scouting for new spots, including where my night setup would be. I had already researched the phase of the moon and the times that would work best for my shot. What we didn’t plan on was the perfect composition being five minutes from town which meant I had to apply a slightly different technique. Instead of capturing the stars as points of light (like the image below) the goal was to capture star trails which takes more time both planning and in the field.
I set up my rig based on composition and about 40 minutes after sundown the process began. While some photographers out there might envision one very long exposure, I approached it a bit differently, mostly because of the amount of light pollution from town. I took the first image, 40 minutes after sundown. To our eyes, it was almost dark but to the camera, there was still a lot of light to be exposed. This particular image is what illuminated the mountain ridges in the foreground. I then left my rig alone for around 2 hours, waiting for the moon to set and the night sky to get as dark as possible.

This is when multiple 30 second exposures by way of intervalometer began which lasted 90 minutes. This highly capable remote can be custom programmed with the exposure of your choice and then set to trigger the camera repetitively while the photographer can retreat to comfort waiting for the set number of triggered exposures to complete. This solves the light pollution problem because the camera’s shutter is only open for a matter of seconds during each exposure and then this group of shorter exposures are combined/stacked in post to create a seamless image where the stars become trails. The length of trail is determined by the overall number of images you stack together.
I left our spot with 181 images and used a subset of those images the single final image which you see above. As some may see, some images require a lot more time than others but having the tools in your tool belt to be flexible and creative help salvage great images out of less than idea situations. Being ready with good planning is key.